Hiking and backpacking photography is one of my favorite types of photography. There is a sense of adventure that comes with strapping on your hiking boots, packing up your camera gear, and heading into the great outdoors. When I was first bringing my camera on hikes, however, I found I wasn’t sure what I needed to bring nor how to capture the photos I was envisioning. In this article, I will share several tips for hiking and backpacking photography including what type of camera to bring, how to carry a camera while hiking, and what lens to use to actualize your hiking photography vision.
Mirrorless Versus DSLR Cameras
When choosing your camera for a hiking or backpacking trip, I recommend mirrorless cameras over the older DSLR models. Mirrorless cameras have several advantages:
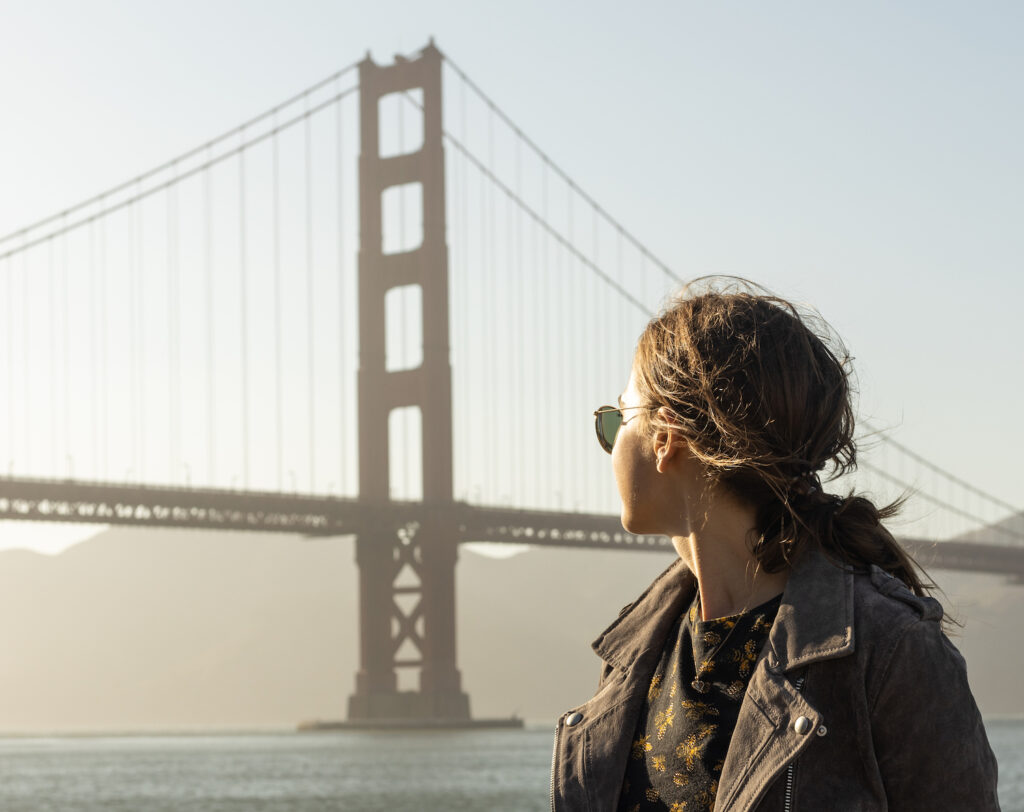
- The first advantage is that mirrorless cameras are lighter and more compact. While backpacking and hiking, every ounce matters and this can have a massive effect on the ease or difficulty of your hike. Recently, I was on a 5 mile hike near Aspen, Colorado with a mirrorless Canon EOS R and with a 35 mm prime lens— a relatively portable set up. Yet to my surprise, I was still sore in my shoulders! This was partly due to the camera bag I was using, which was an over the shoulder bag. But it definitely showed me the importance of packing light.
- The second advantage to mirrorless cameras for hiking and backpacking is the improved technology. Mirrorless models have many more valuable features including faster fps limits, more autofocus points, better low light performance, autofocus subject tracking of people and animals and more.
- The third advantage to mirrorless cameras for hiking and backpacking photography is for longevity. Canon is no longer making EF lenses for their DSLR line. All new lenses will be of the RF variety. If you plan on doing photography for a while, this is definitely a good reason.
I personally use the Canon EOS R. This camera is relatively affordable for what you get. It’s a full frame mirrorless camera that has excellent lowlight performance, 31 megapixels for fantastic detail (perfect for landscapes), and a fully articulating camera screen. It is also significantly lighter than the Canon 7D I used to shoot with.
Choosing A lens for Hiking and Backpacking Photography
Which camera lens you choose for your hiking or backpacking is largely dependent on what subject matter you are wanting to take photos of. Wildlife photography versus landscapes versus hiking portraits require very different demands. If you want a more in depth breakdown, check out our articles on the best Canon, Sony, and Nikon lenses for travel photography.
Hiking lenses for wildlife photography:
For wildlife photography, you’re definitely going to want a telephoto lens, since it will be very difficult to get close to your subject. You may also want a fairly fast lens with a wide aperture in case you are having to photograph the animal in a lot of shade. You’re going to usually want to “freeze” the animal and so you won’t always be able to lower your shutter speed to make up for any lack of sufficient lighting.
I took this photo in Austin of an owl high up in a tree with a Canon RF 70-200 f/2.8 USM:

Hiking lenses for landscape photography:
For landscape photography, wide angle lenses are often the best option. Even with my 35mm prime lens, I often find I need a wider angle when trying to capture a vast landscape. As I describe in my Best Canon Lenses for Travel Photography article, the Canon RF 15-35mm f/2.8 lens is an ideal candidate.
Lenses for Hiking Portraits:
If you’re wanting to take hiking portraits, you might need the ability to take a wide angle photo to capture your subject within a beautiful scene. These shots are important when the subject in “in” the space you are trying to capture rather than in front of it.
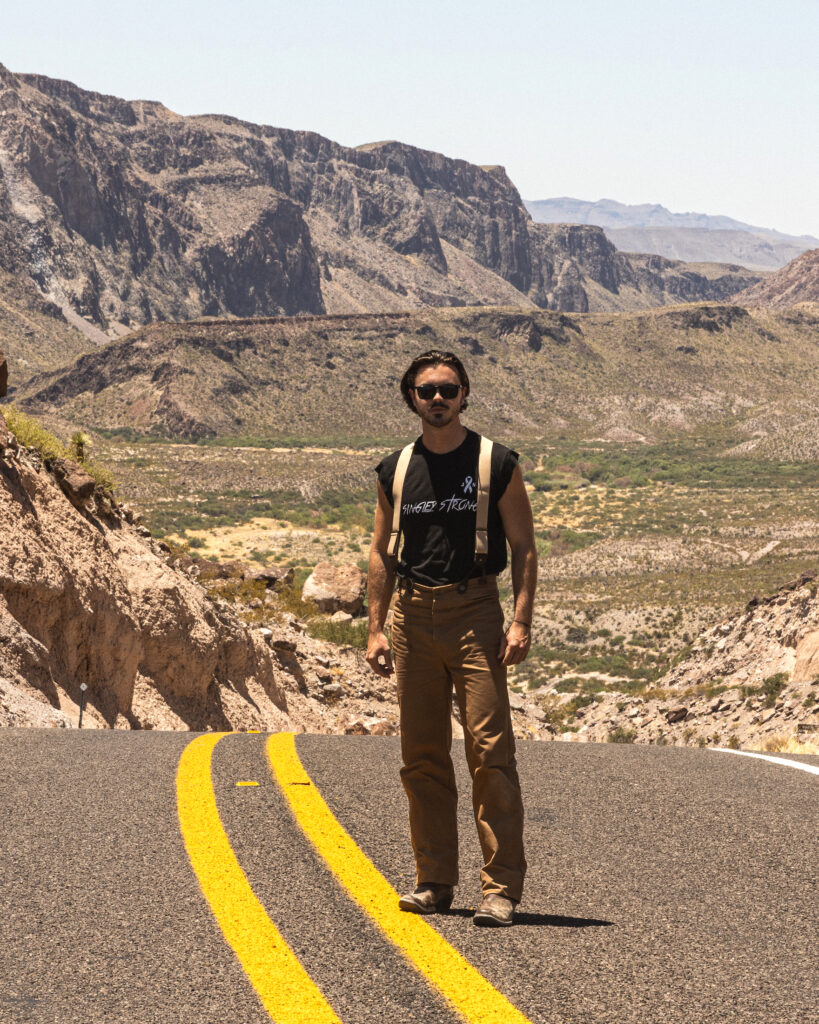
You also may need to compress space to place something far in the distance close to your subject, such as a mountain on the horizon. Here is an example of the two photos taken in Big Bend State Park only seconds apart from each other. The only difference is the focal length and therefore, compression of space in the image. You can see clearly how much closer the mountains in the background appear next to the subject:

For hiking portraits, I recommend you use something like the Canon RF 24-105 mm f/4 USM lens. This lens will give you all the variability you need with the wide angle 24 mm focal length as well as the telephoto compression of the 105 mm focal length. The f/4 maximum aperture is not very wide, meaning the background blur (bokeh) and lowlight performance are a bit reduced in comparison to a camera that has sub-f/2.8 capabilities. For hiking photography though, you are usually in very bright conditions. On a recent trip to Big Bend State Park in West Texas for example, I rarely dropped my f-stop under f/7.1.
carrying your camera while hiking or backpacking
There are many ways to carry a camera while hiking or backpacking. For most people though, a camera harness will be the most comfortable option. The Cotton Carrier G3 camera harness allows you to attach your camera in a fixed position to your chest so that it is not swinging around while you hike but it is still easily accessible. Additionally, it has a second strap for extra security when you remove it from the clip to take photos. This harness also allows you to comfortably wear a backpack as well, making it perfect for both hiking and backpacking photography.
To find the best camera harness for your specific hiking needs, check out our list of best camera harnesses for hiking and backpacking.
I do not recommend backpack style camera bags for hiking photography, since often there is not much room for other items you may need on your hike, not to mention that you will have to take your backpack off every time you want to take a photo. Also, if you are backpacking, this carrying method becomes immediately untenable.
Lens filters for hiking and backpacking photography
Lens filters are a more specialized aspect of photography in that they are very specific to the task and circumstances. When I first learned about filters, it was a bit difficult to understand what they were used for. There are probably only two filters applicable for hiking and backpacking: polarizing filters and neutral density filters. They both are mainly be used in very bright lighting situations, such as outdoors during the day.
Polarizing Filters
The first type of lens filter you might need while hiking is a polarizing filter. These filters cut out a certain amount of reflective light from a scene and can make colors more vibrant in the scene. This effect will change the image a bit and you may prefer this this or not depending on your vision for the photograph. Here is an example of the same scene at the Maroon Bells hiking trail with and without a polarizing filter with nearly identical image post-processing:
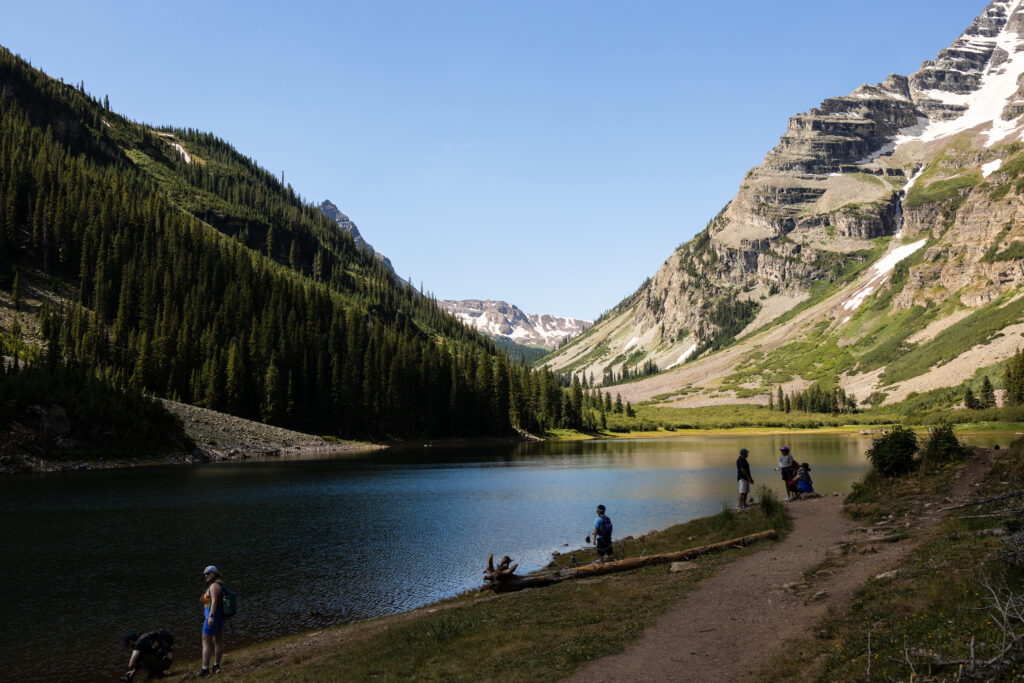

As you can see, the image with the polarizing filter is a bit darker and a bit more saturated. Often, surfaces such as leaves, grass, snow, and water can reflect light due to their shine. This creates excessive highlights and drowning out the color. Polarized lenses cut out this excess light, making the colors more intense.
Polarizing filters are also used to cut out reflection when taking photos of water. As you can see on the lake, the filter cuts out the reflected light which allows the viewer to see to the bottom of the body of water if it is shallow enough.
Neutral Density Filters
The second lens filter you might want on a hiking or backpacking photography trip is a neutral density (ND) filter. ND filters essentially make the scene darker by a certain number of stops. A decrease of one stop of light equates to a reduction of the amount of light hitting the sensor of one half. Each extra additional stop further halves the amount of light.
ND filters are fairly common for videography, but the main reason to get an ND filter in photography is if you are doing a long exposure in bright conditions during the day. A common example of this use-case would be taking a photo of a flowing stream or waterfall and using a longer exposure to get that silky effect on the water.
Best time of day for Hiking and Backpacking Photography
An important consideration when planning a hiking or backpacking photoshoot is the time of day. The best times to do hiking photography are generally about two hours after sunrise and two hours before sunset. This is not always feasible, but if you are going out to get specific shots of certain areas, it’s important to take this into consideration.
Where the sun is in the sky will also greatly affect your image, and some scenes are better shot in the morning than the evening. If you are photographing a specific landmark, then you will want to take this into consideration, and even look up the work of other photographers to see how they tackled the subject matter.
Importantly though, if you are shooting in the evening, be very aware of how much light you have left. It’s very dangerous to be unintentionally stuck on a trail after dark and this should be avoided at all cost.
While backpacking, it’s much easier to control the time of day you take photos since you are camping out, and this is a major benefit of backpacking over hiking for photography. If you are backpacking, the hour before and after sunset or sunrise are the most beautiful times to shoot.